Alcohol marker painting of Tenaya Lake at Yosemite Tioga Pass — Copic marker tutorial by InkTorrents Graphics

Painting Yosemite with Copic Markers

Alcohol marker painting of Tenaya Lake at Yosemite Tioga Pass — Copic marker tutorial and swatches by InkTorrents Graphics


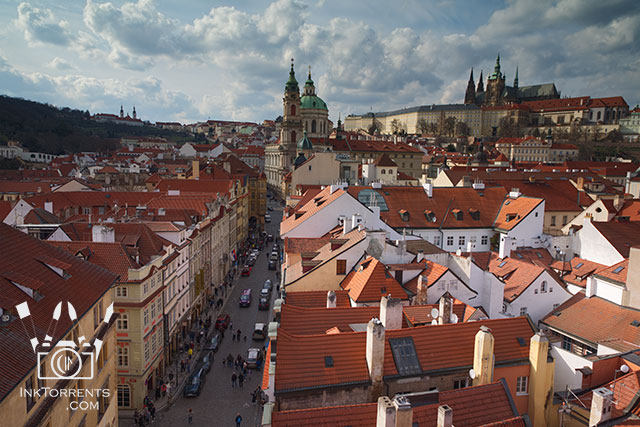
There are familiar places in the forests and mountains of California that I love revisiting for a reset and recover.   I fell in love with the High Sierra mountains and Tioga Pass during my first visit many years ago.  It’s a place that slows me down and pushes me to work harder at the same time.  Recently, I made a marker painting from a lakeside drawing I did there.  Along with the painting, I also want to talk about swatch making, different papers for marker painting, and other accompanying tools that I use with markers on this Outside the Lines art supply review.


Tenaya Lake Tioga Pass Yosemite National Park photo by InkTorrents Graphics


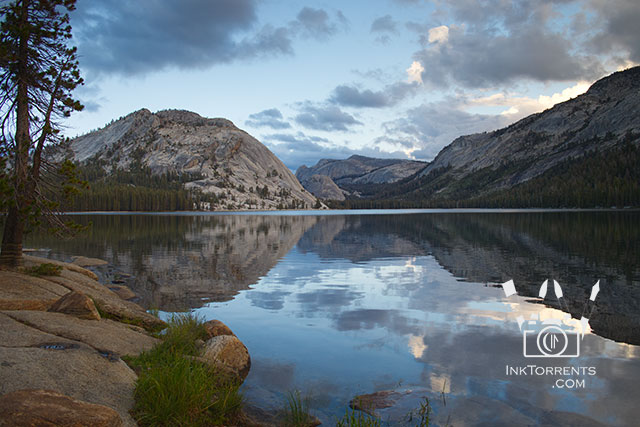
Late afternoon at Tenaya Lake is one of my favourite places on Tioga Pass. Here time really slows down for me.  I have a favorite secluded spot behind a gigantic glacier erratic.  I tuck in behind that boulder with my camera and my sketchbook.  While I wait for the sky color to change for photography as the sun sets,  I try to make sense of the vast landscape in front of me on an 8″x5″ sheet of paper.  


Tenaya Lake at Yosemite Tioga Pass micron pen drawing by InkTorrents Graphics


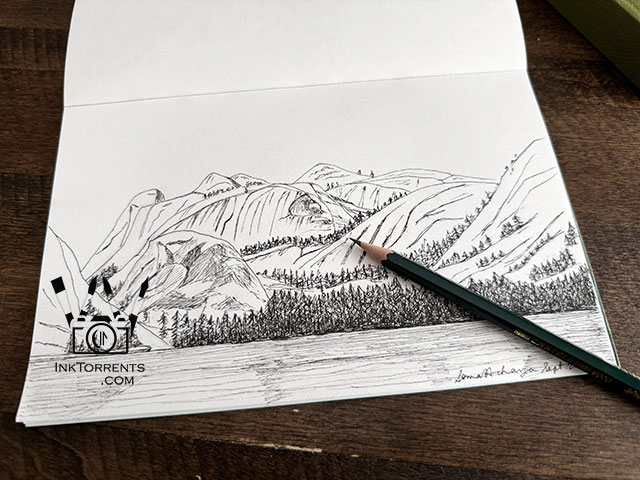
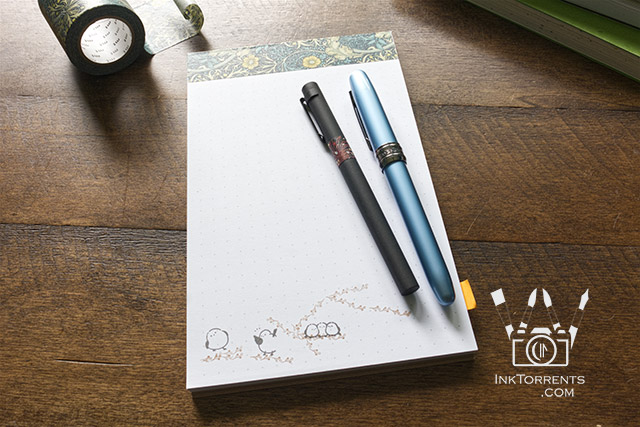
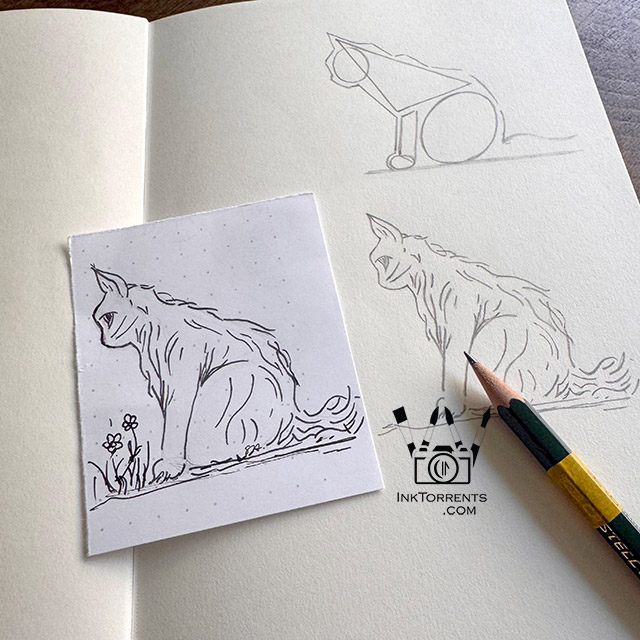
Flipping through my sketchbook for a different project, I came across this drawing.  In January, my husband got me a set of Copic markers for my birthday.  I got excited about painting this with my new markers.

Note:  You can use these tips for any alcohol markers, not just Copic.   I shy away from using generic paints.  Paint can be toxic if not properly bound, and I simply don’t trust the quality control of the pigments and carriers of generic brands.


How to make alcohol marker swatches — Copic marker tutorial by InkTorrents Graphics


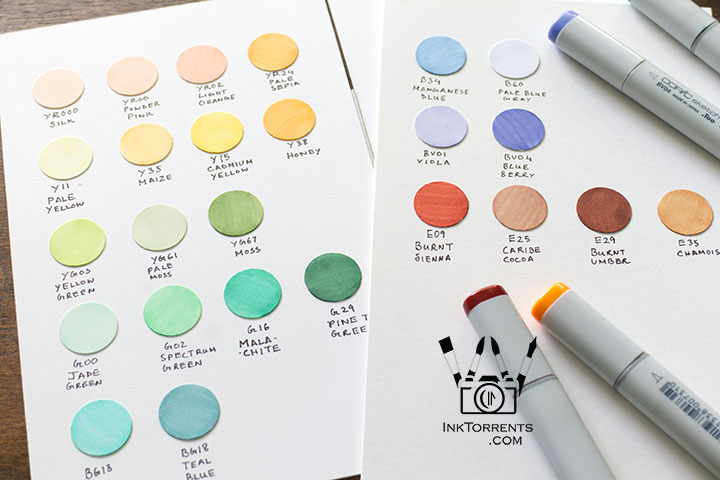
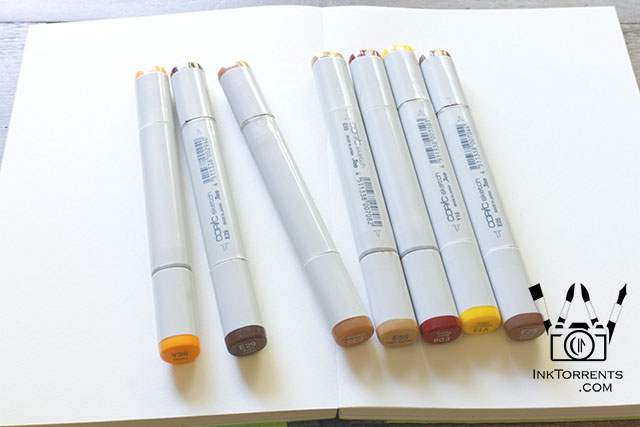
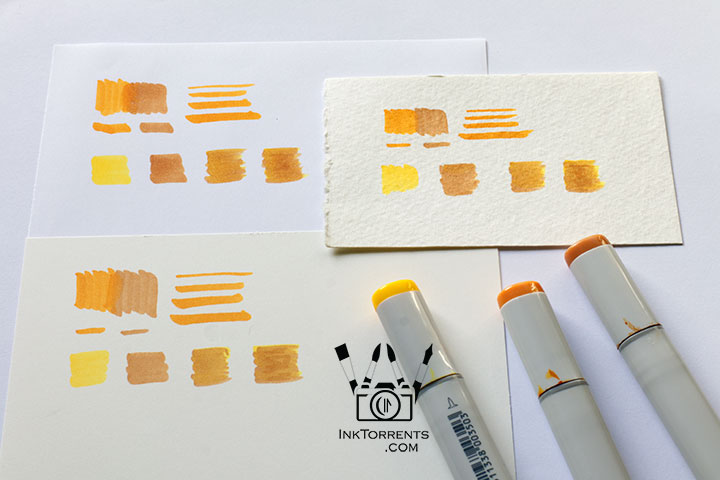
I always swatch new colors.   Instead of guessing or trying out the shades all over again, I know exactly what colors I need to start a painting when I have my swatch cards at hand.


How to make alcohol marker swatches — Copic marker tutorial by InkTorrents Graphics


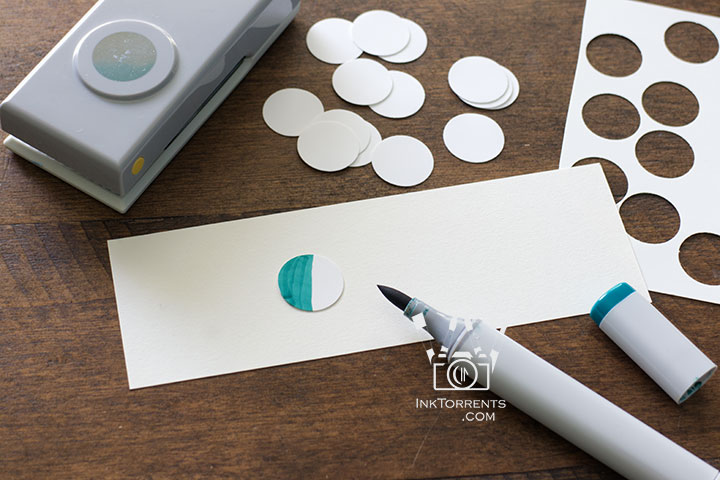
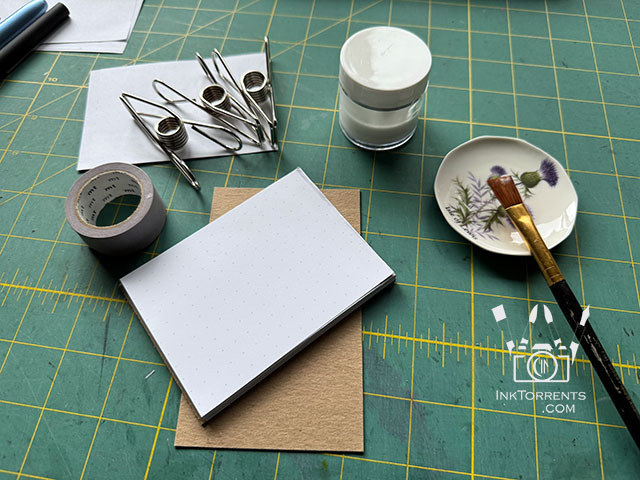
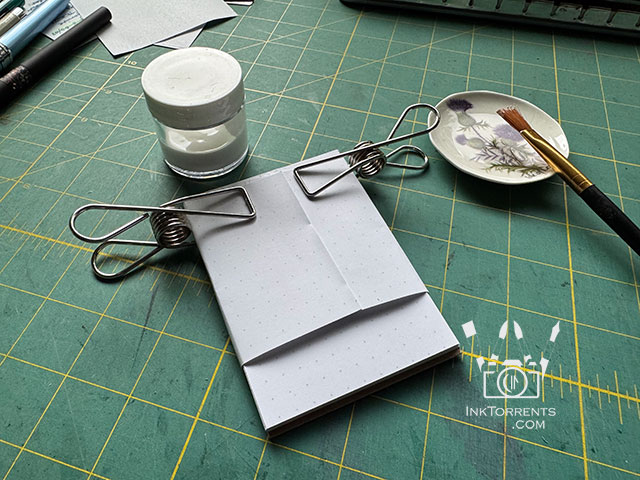
I used a 3/4″ circle cutter to cut out the circles and painted the colors on them.  Afterwards, I affixed them on cardstock with glue sticks.   I could have painted on the paper directly, but I wanted have a little fun with the swatches.  The process of making swatches is very therapeutic for me.


Pencils and pens for alcohol markers — Copic marker tutorial by InkTorrents Graphics


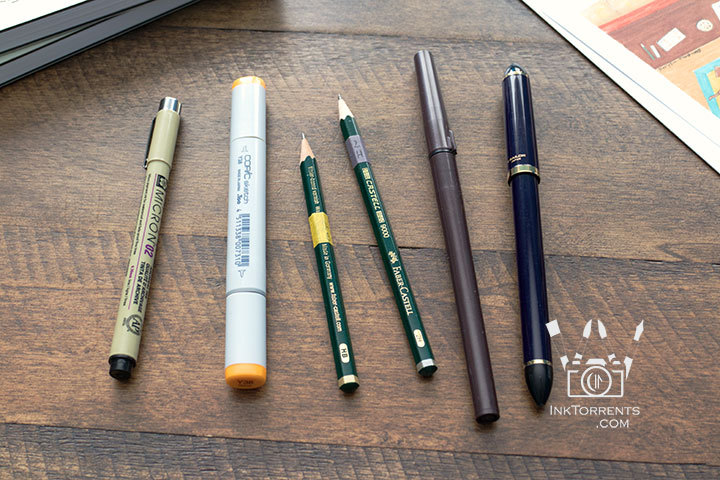
A few other tools I use along with the markers –

  • 02 and 005 micron pens – For black outlines and shading.
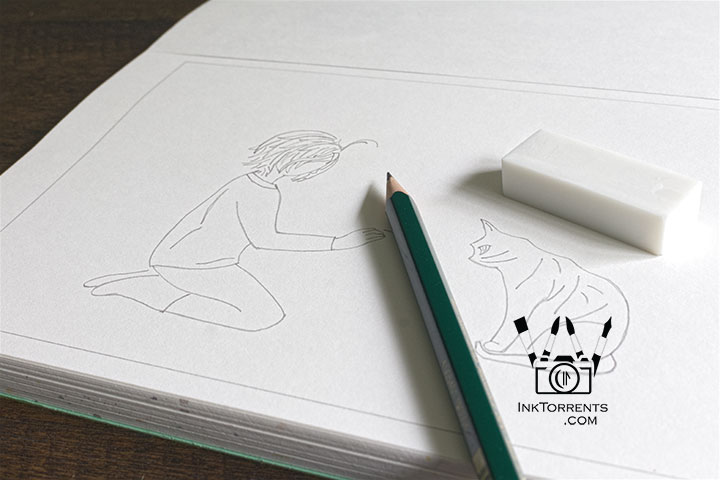
  • HB pencil – For the initial sketchbook drawing.  Creates soft lines on paper that are easy to erase.
  • 2H pencil – For copying the drawing over to the paper for painting.  Creates light markings that are barely visible under the painting.  

Pro-tip – A wide brush-pen or a flat-nib fude pen filled with permanent ink is nice to have when you have a large area to fill and a micron pen is too small.


Paper types and tones to use with alcohol markers — Copic marker tutorial and swatches by InkTorrents Graphics


Paper plays a big part in painting –

Smooth marker paper blends colors best — the longer the alcohol stays wet, the smoother the blend. Paper tone matters too: white produces bright, luminous colors while cream produces warmer, more subdued tones.

Examples from the photos:

  • Top left (white) — Most luminous and best blending.  Detail lines didn’t show well.
  • Bottom left (cream) — Slightly muted colors, good blending.  Detail lines remained visible.
  • Top right (high-texture watercolor, cream) — Absorbed paint quickly, leaving lines.  No blending, but great for bold color-block styles.

Pro tip – Alcohol markers bleed through most paper, so place an extra sheet underneath to protect your surface.


Feel free to click on the image to pin it to your Pinterest board for future use.


Alcohol marker painting of A Girl and Her Cat in a room with window view — Copic marker tutorial by InkTorrents Graphics


Now that I have my swatches and a feel for the markers on paper, I am ready to paint.

Pro-tip – Before you start, take a little time to think about the mood and style of your painting, then choose the paper accordingly.  Use the swatch card to pull out some of the main colors.  Keep a scrap paper handy to test color combinations.  These habits will make a big difference.  

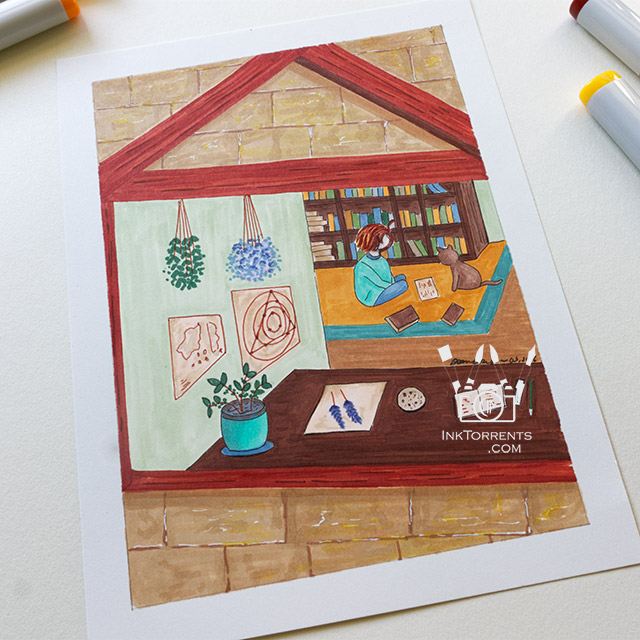
I wanted to have a warm and cozy feeling for this  Girl and Her Cat painting, so I used the warmer-toned paper.  Just as expected, details, textures, and shadows remained visible on this paper.


Alcohol marker painting of Tenaya Lake at Yosemite Tioga Pass — Copic marker tutorial and swatches by InkTorrents Graphics


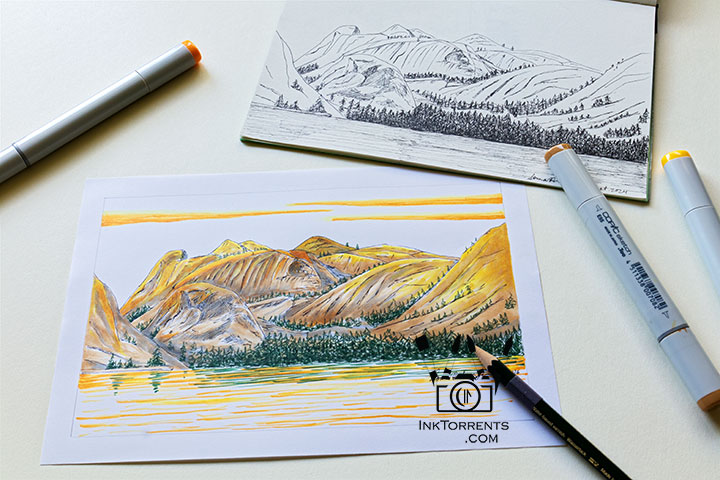
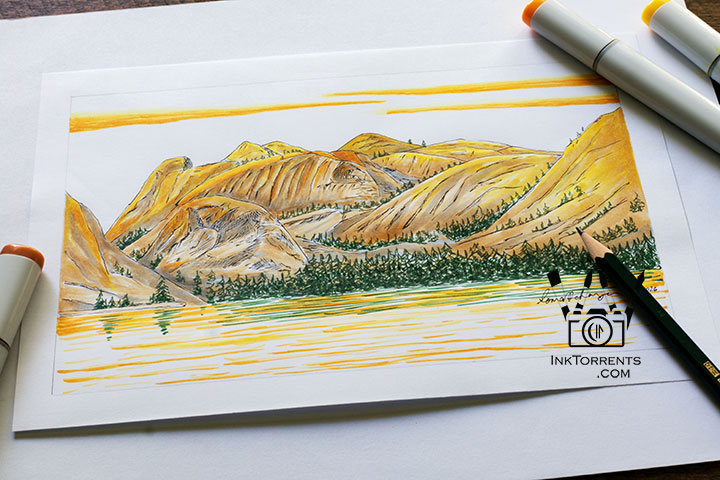
For this landscape painting, I wanted the colors to be very vibrant to depict the late afternoon sunlight on the rocks.  I used the white paper for this one.  

I started the painting by drawing the lines and shading marks with micron pens, similar to the drawing in my sketchbook.   Pro-tip – To prevent smudging, give the micron pen lines a few minutes to dry before painting on them.


Alcohol marker painting of Tenaya Lake at Yosemite Tioga Pass — Copic marker tutorial and swatches by InkTorrents Graphics


I started with the lightest yellow and earth tone, then layered the other colors slowly on top.  On this paper, layers of colors blended into each other, giving me a watercolor effect.

Painting this was a beautiful way to rekindle the memory of our last visit there.


Copic marker drawing of Girl and her cat in a handmade blank notebook with Yosemite Valley cover art — InkTorrents Graphics


I just started a new drawing for my next marker painting.   I drew them a little closer than usual so the faces are more visible this time.  These two are playing outside again, and this time they have friends.  I love drawing stories about these two.


Copic marker flower painting in a handmade blank notebook with Yosemite Valley cover art — InkTorrents Graphics


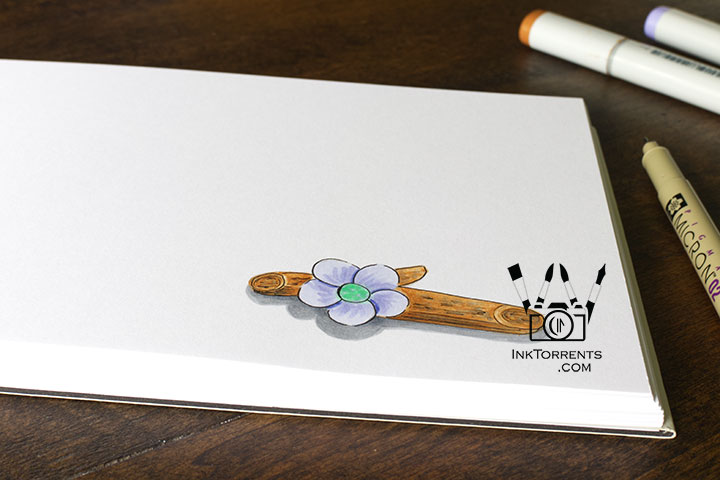
Last weekend, I drew this little flower in one of my handmade books.  The colors blended seamlessly, and I was also able to add additional detail strokes.  The paper kept the colors vibrant and bright.  I am really happy with this new smooth, thick paper I am using for my 100% handmade journals.  You can purchase them here in my shop.  They are wonderful for both writing and drawing.


I am very thankful for living close to these beautiful places that inspires me to draw and paint.  This gives you a little insight into my painting process.  I hope you can incorporate a few of these techniques in your own painting habits.  Most importantly though, just play with paint and paper.

Until next time,
-Soma


I am linking up with the linky parties on my Links page.  Please pay a visit to some of them.  Hosts of linky parties – please grab a photo of you choice for your party.  Thank you for hosting!


Leave a comment


Copic Marker stone cottage painting - Girl And Her Cat by Soma Acharya @ inktorrents.com InkTorrents Graphics

Little Stories – Winter Playtime

Copic Marker stone cottage painting - Girl And Her Cat by Soma Acharya @ inktorrents.com InkTorrents Graphics


Hello Everyone!  A hearty welcome to all new readers and welcome back to the old faces.   It has been quite a busy winter holiday for me.  We traveled to a new country.  I made a few books for journaling, and I also got some art supplies for my birthday.  On the note of journaling,  I have a little tutorial to share with you today.


Prague skyline from Lesser Tower by Soma Acharya @ inktorrents.com InkTorrents Graphics


Rooftops in Prague in the afternoon sun


During the month of December, we made plans to visit the Czech Republic (Czechia).  After much anticipation, the day finally came in March.  We were there for a week visiting Prague and a few other small towns.   We were on our feet a lot, getting lost in the little streets and alleys, looking at old architecture and visiting coffee shops.  It was truly amazing.  I will share a lot more about our travel in a future post. 


Making notepad with washi tape by Soma Acharya @ inktorrents.com InkTorrents Graphics


I needed a notepad for my Japanese studies.  I gathered up a stack of  scrap paper, a piece of chip board and a roll of washi tape, and spent a leisurely evening making this notepad.  It was a fun and easy thing to make, so I thought I’d share the how-to with you.


Supplies – paper, a thin chip board (e.g., cereal box), washi tape or masking tape, binder clips, scissors, glue, and a brush for the glue.  A paper trimmer would be good, but not required.

Using scissors or a paper trimmer, cut all the paper to a size that you like.  Cut the chipboard to the same size as the paper.  Pro tip – I recommend adding an extra 1/8″ to the longer side.

Take the stack of trimmed paper and the chip board, line them up and bang the edges of the stack on a table surface a few times until you have smooth edges all around.  Put binder clips on each side to hold the stack together.  Pro tip – I use a couple of scrap papers between the clip and the pad, so the clips do not dent or mar the paper. 

Using the brush, apply glue along the smooth shorter edge.  I like to run my finger over the edge to smooth out the glue after applying.  Pro tip – Do not put too much glue all together, it will seep into the pad.  Apply at least 2-3 thin layers with adequate drying time in between.

Make sure everything is completely dry before you take the clips off.


Making notepad with washi tape by Soma Acharya @ inktorrents.com InkTorrents Graphics


Cut your washi tape to the same size as the width of your pad.  Start by pasting it on the glued side of your pad as straight as you can.  I usually apply the tape on the front side first, then wrap it over the glued edge and paste it on the back over the chipboard.  Try to pull it taught over the glued edge as best as you can.  Use your fingers to smooth it all out.  That’s it!  If you used a plain tape, you can draw something on it, or use rubber stamps to decorate it.  


BTW, I personalised the black pen with a band of red washi tape around the cap.   I thought it added a fun touch to the plain black pen.


Making notepad with washi tape by Soma Acharya @ inktorrents.com InkTorrents Graphics


I love William Morris designs.  I used a wide WM washi tape for this pad, and a plain washi for the little one.  I also stamped on a few shima enaga birds with a few branches.

Please excuse the orange sticky in the photos.  I used it to mark my study notes, and forgot to remove it before taking the photo.


Forest cat drawing with guidelines by Soma Acharya @ inktorrents.com InkTorrents Graphics


I made at least four books during the holidays with different purposes in mind.  This one is an art study book I made for practice.  Warming up here with a little forest cat as the very first drawing in it.

The other books are going to be used for notes and travel journals.  I will save that for another day with notes on how I work on my travel journals.


My husband always gets me a few art supplies for my birthday.  This year, I got a collection of Copic markers in warm earth tones that he picked out for my paintings.  Although they would have been great for a landscape painting,  I wanted to draw something more special with them.  I also tried out a few new techniques with the markers.


Copic Marker stone cottage painting - Girl And Her Cat by Soma Acharya @ inktorrents.com InkTorrents Graphics


I always draw the Girl and Her Cat outdoors, and I wondered what their room might look like.   It seems they live in a stone cottage, and their room is full of findings from their little adventures outside.  I really want to explore a bit more into this scene and add a few more things that I know they have tucked away in that room.


Lastly, a small shop update – Light Journals (formerly known as Everyday Journals) are back in the shop, and my hardcover books are now made with much thicker paper.  All hand-stitched and handmade by me and are suitable for drawing and writing.


This winter holiday was filled with experimenting and playing which I love the most.  I look forward to sharing more photos, books and art chats including Outside the Lines (posts on art supplies) in the coming days.


Until next time,
-Soma


I am linking up with the linky parties on my Links page.  Please pay a visit to some of them.  Hosts of linky parties – please grab a photo of you choice for your party.  Thank you for hosting!


Leave a comment


error: Content is protected !!