Pencil Cases With Adjustable Flap – Tutorial

Pencil Cases With Adjustable Flap – Tutorial | Whims And Fancies


Since we live on the Pacific coast, any overseas travel ends up being a very long affair.  First, it’s about a 5-hour flight coast to coast across the US, then crossing the Atlantic takes another 8+ hours depending on the destination.  I always pack in a sketchbook and pencils to keep myself occupied.

It occurred to me that a small pencil case would be nice as a storage for those flights.  That way, I wouldn’t have to keep holding them in my hand and also wouldn’t risk dropping them.


Pencil Cases With Adjustable Flap – Tutorial | Whims And Fancies


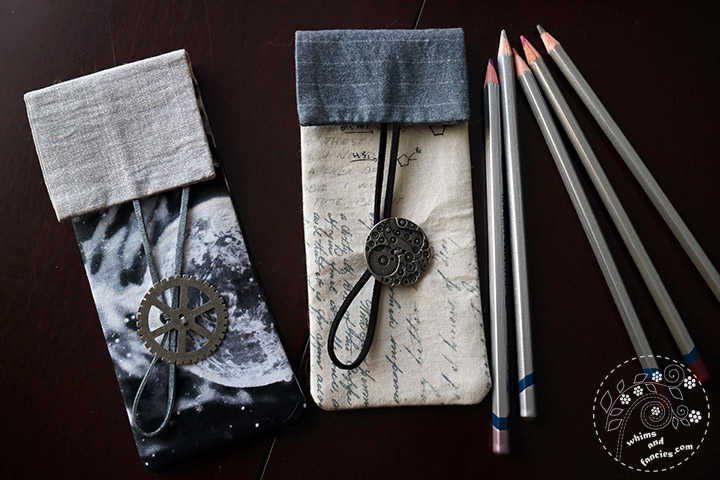
The grey one was so easy to make that I decided to make another one using the space fabric and share a tutorial with you.

The one I made is 3.0 inches wide and holds 7-8 pencils.  You can adjust the width to add more pencils, of course.   Substitute the 3.5 inch with your own number for the adjusted width.  Just remember to add 0.5 inch for seam allowance (0.25 inch on each side).

You don’t have to be too exact with your measurements for this pencil case.  There is room for mistakes and you can always trim to align the sides.  I used 0.25 inch seam allowance.


Materials –


Outside Fabric (space fabric in the pictures) –

7.0 x 3.5 inches – 2 pieces, one for the back side and one for the front side

Lining Fabric (light grey/silver fabric in the pictures) 

A contrasting colour works well for this project.

7.0 x 3.5 inch – 1 piece

4.0 x 3.5 inch – 1 piece

10.5 x 3.5 inch – 1 piece

Iron-On Interfacing –

Light-weight interfacing, just stiff enough to provide stability.

7.0 x 3.5 inch – 1 piece

10.5 x 3.5 inch – 1 piece

Button – 1 medium to large size

Cord – 16.0 inch


Pencil Cases With Adjustable Flap – Tutorial | Whims And Fancies


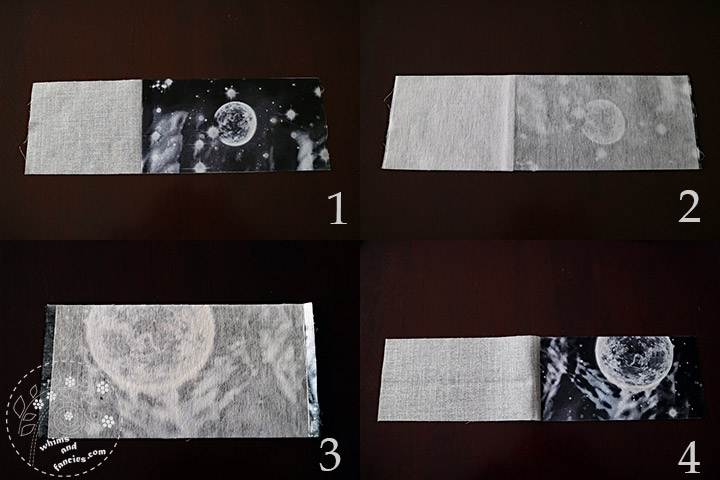
1. Place the 4.0 x 3.5 inch lining fabric on top of the 7.0 x 3.5 inch outer fabric that is for the back side, right sides facing together, aligned at the top.  Sew the 3.5 inch top edges together.  Note – If you are using directional outer fabric, make sure to stitch the lining piece to the top edge of the outer fabric.  Press the seam.

2. Iron on the 10.5 x 3.5 inch interfacing on the back of the above piece.  This is the finished back piece.  Set it aside.

3.  Take the 7.0 x 3.5 inch outer fabric that is meant for the front side, iron on the 7.0 x 3.5 inch interfacing on the back of this fabric.

4.  Place the 7.0 x 3.5 inch lining fabric on the piece from step 3, right sides facing together, aligned on all sides.  Sew the 3.5 inch top edges together. Note – Here also, if you are using directional outer fabric, make sure to stitch the lining piece to the top edge of the outer fabric.


Pencil Cases With Adjustable Flap – Tutorial | Whims And Fancies


5.  Fold the lining fabric behind the outer fabric,  iron the seam and top stitch.  Measure approximately 2.5 inches from the bottom (open edge) and sew a button in the middle.  I stitched the button only to the outer fabric.  This is the finished front piece.

6.  Place the 10.5 x 3.5 inch lining fabric wrong side up beside the finished front piece from step 5, aligning the bottoms.  Mark a spot in the middle of the lining fabric such that the spot is at least 0.5 inch under the top edge of the front piece on the right side. Sew the cord on the wrong side of the lining fabric on that marked spot.  Note – Make sure the cord is pointed upward, away from the bottom edge, as shown in the picture.

7.  Lay down the long back piece right side up.  Place the smaller front piece on top of it with the lining fabric side facing up, outer fabric side facing down.  Then place the cord-stitched lining fabric, wrong side up, as shown.  Note – Make sure the cord is pointing toward the top side.  I offset the pieces in the picture to show you the placements.  Align all sides.  Sew the bottom side (opposite the cord) first, then sew the two long sides together.  Leave the top open so you can turn the pencil case out.

8. Trim the bottom corners and slowly turn the pencil case out.
 

Pencil Cases With Adjustable Flap – Tutorial | Whims And Fancies


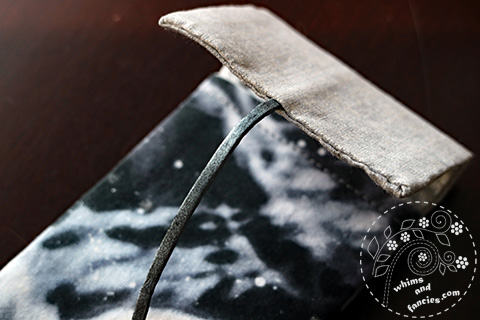
9.  Place a pencil in the pocket now and fold the flap over for sizing.  Trim the edge if you want a shorter flap.  Note – If you trim, make sure to tuck the cord in between the lining and the back piece to keep it out of the way.  Fold the open edge in 0.25 inch all around and iron.  You can now top stitch the top gap to close it.  I didn’t like that look, so I blind-stitched mine.  Make sure the cord is in the centre as you stitch the gap shut.


Pencil Cases With Adjustable Flap – Tutorial | Whims And Fancies


That’s it!  This is the back of the case.


Pencil Cases With Adjustable Flap – Tutorial | Whims And Fancies


Fill the case with pencils, loop the cord around the button a couple of times and tie a knot.  I used a cord instead of velcro or a push button because I wanted the opening to be versatile.  This way I can use it for pencils or pens of different lengths and still be able to close the case snugly.


I hope you find this tutorial useful.  I am sure you can think of many things to store in them other than pencils and pens.


I really liked the steampunk charm pieces, but I needed buttons.  So I drilled holes in them to make buttons out of them.  My local craft store didn’t have any grey cord, and I really wanted to use a silver/grey cord for the space-themed one.  I cut a piece of black cord, taped the two sides to a piece of paper, then brushed silver acrylic paint on it.  It worked out wonderfully.  This whole project ended up being completely improvised, starting with a wrong cut of fabric!


Happy Sewing,
-Soma


I am linking up with the linky parties on my Events And Links page.  Please pay a visit to some of them.

 https:


Leave a comment


Pencil Case And Index Card Drawings

Viking Penguin Quilt Pattern | Whims And Fancies  

Purchase Viking Penguin Olaf pattern


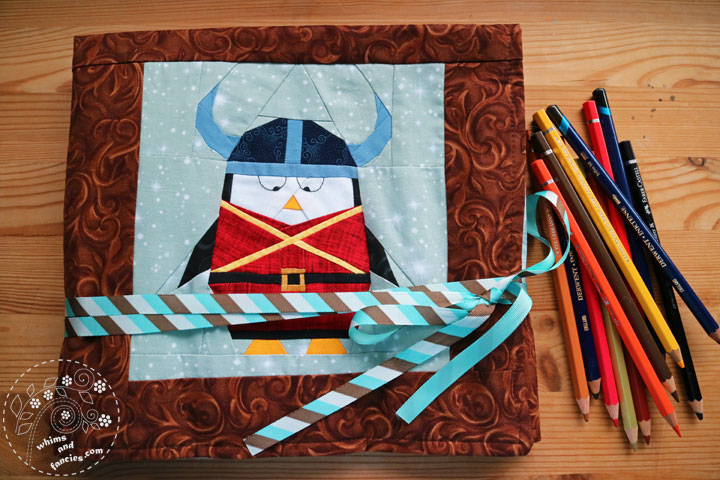
Last year I was working on the icad or index-card-a-day project where I painted one index card per day over the span of two months, totalling 60 cards.  During that time I purchased some loose colour pencils.  I had been wanting to draw a little penguin quilt pattern in Viking costume for ages, so I decided I would make that block for a pencil case.

This little penguin is Olaf and he loves his helmet with horns on it.  I tried to tell him that Viking helmets didn’t have horns, but he was most insistent.  He thought they made him look more mighty.

The pattern is for a 10″ block, but I made a 7″ one for my pencil case.  I finished the block long ago and finally, during my attempt to finish a few projects, the pencil case was completed.  I usually travel with my pencil cases, so I needed to use a dark fabric.  Brown was perfect, plus, it made me think of a wooden hut where Olaf might live.


Pencil Pouch Tutorial | Whims And Fancies


I used a frosty branch fabric for the inside.  After all, penguins have to have snow!  This pencil case comfortably fits my pencils and my water brushes.  It is not too large, but big enough for me to toss a sketchbook in there and tie the ribbons around it.

Olaf is available in my shop if you want to make one.  I am thinking of making a couple of friends for him and Polaris –


Penguin Quilt Pattern | Whims And Fancies


Purchase Little Penguin Polaris Pattern


A couple of years ago, my friend Janine from Rainbow Hare hosted Making Christmas.  I wrote a tutorial for that event on how to make a pencil case featuring a decorative piece in the front.  I made this little pencil case then with Little Penguin Polaris for my micron pens.  I followed my own tutorial to make the new one and it hardly took any time to make it.


Interestingly enough, I made the Viking Penguin Olaf block when I shared the last set of index card drawings.  I often thought of posting them together in one post.  Before I show them though, I thought I’d share a list of all the mediums I used on this project.  I had no idea I used these many!


  • Micron pens
  • Micron Gelly Roll pens
  • Uniball Signo pen – white
  • Uniball Gel Impact pens – gold and silver
  • Recollections Metallic pen – copper
  • Pentel Touch pens – silver and gold
  • Faber Castell Pitt artist pens
  • Faber Castell Aquarell watercolour pencils
  • Faber Castell Albrecht Dürer watercolour pencils
  • Inktense pencils
  • Prismacolor pencils
  • Prismacolor markers
  • Gesso
  • Turpentine


I have never had any training in painting, I paint because it makes me happy.  This project definitely pushed me out of my comfort zone and helped me explore new venues.


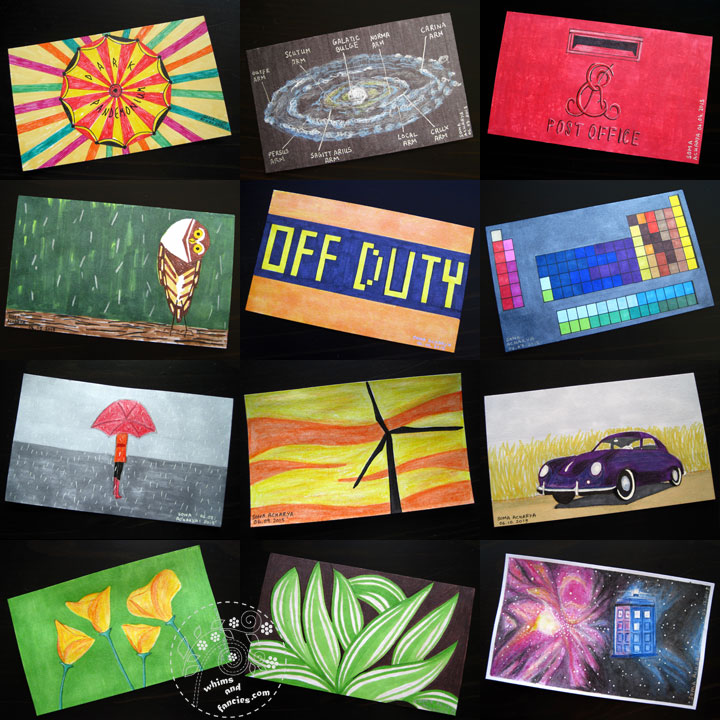
Index Card Paintings | Whims And Fancies


1. Carnival  2.  Milky Way map  3.  Edwardian Mailbox for P. G. Wodehouse

4. Owl – playing in the rain 5. Taxi  6. Element Picker

7. Solitude in rain  8. Wind turbine sentinel  9.  Vintage Porsche

10. California poppy  11. Corn lilies  12.  Tardis


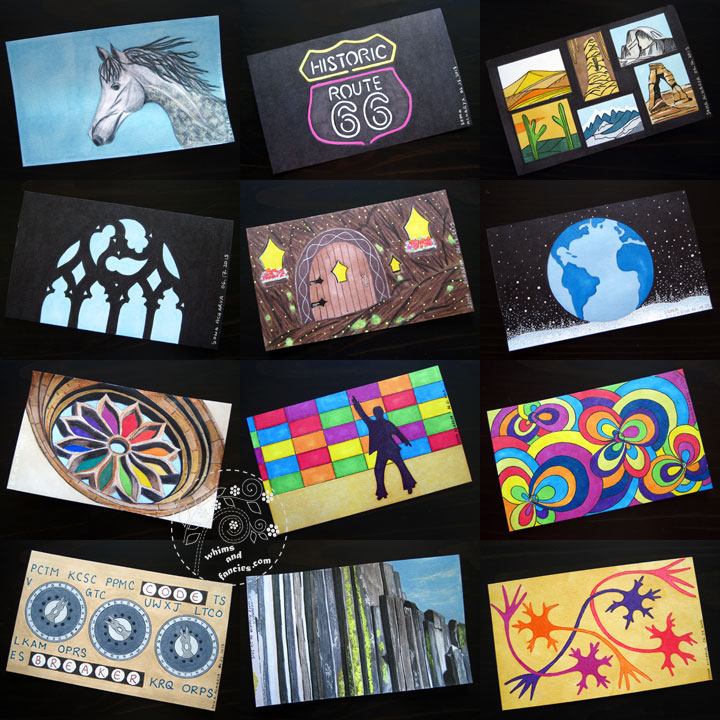
Index Card Paintings | Whims And Fancies


13. Grey dappled foal  14. Route 66 neon sign 15. National parks of America

16. Melrose Abbey 17.  Fairy Door  18.  Snow Globe

19.  Dryburgh Abbey  20.  Disco  21. Psychedelic gravitational waves

22. For Alan Turing 23. Devil’s Postpile 24. Dancing neurons


Index Card Paintings | Whims And Fancies


25. Peacock feather  26. Endeavour & transit of Venus  27. Solar prominence

28.  Ice cream  29. Shel Silverstein 30. Exploding clock

31. Blustery autumn day  32. Unplugged  33. Pre-dawn driving

34.  Self-portrait – walking into the unknown 35. Steampunk wings 36. Stargazing


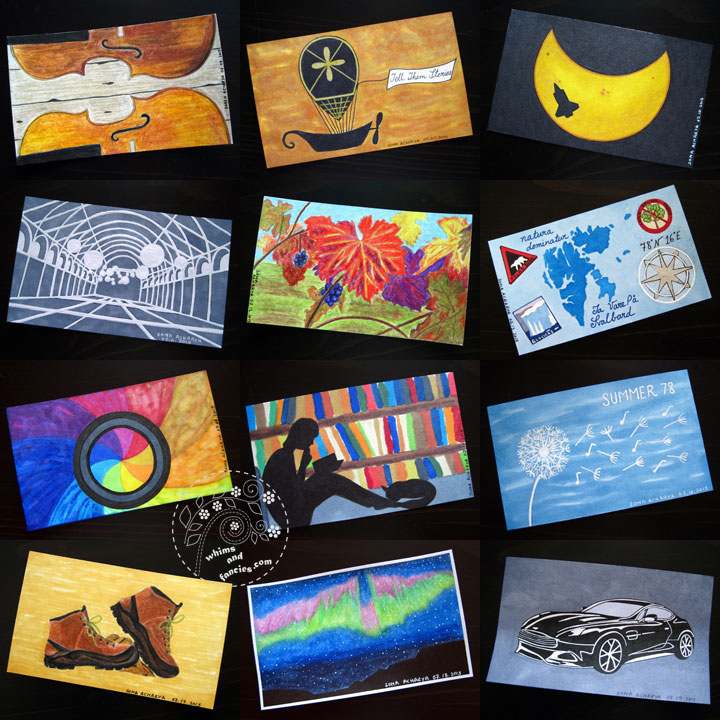
Index Card Paintings | Whims And Fancies


37. My violins 38. Tell Them Stories 39. Solar eclipse and Shuttle Endeavour

40. Paper tunnel 41. Vineyard  42.  Svalbard

43.  Focusing through lens 44. Saturday night  45. Playing summer 78 by Yann Tiersen on piano

46. Love to walk  47. Dancing Aurora  48. Aston Martin


Index Card Paintings | Whims And Fancies


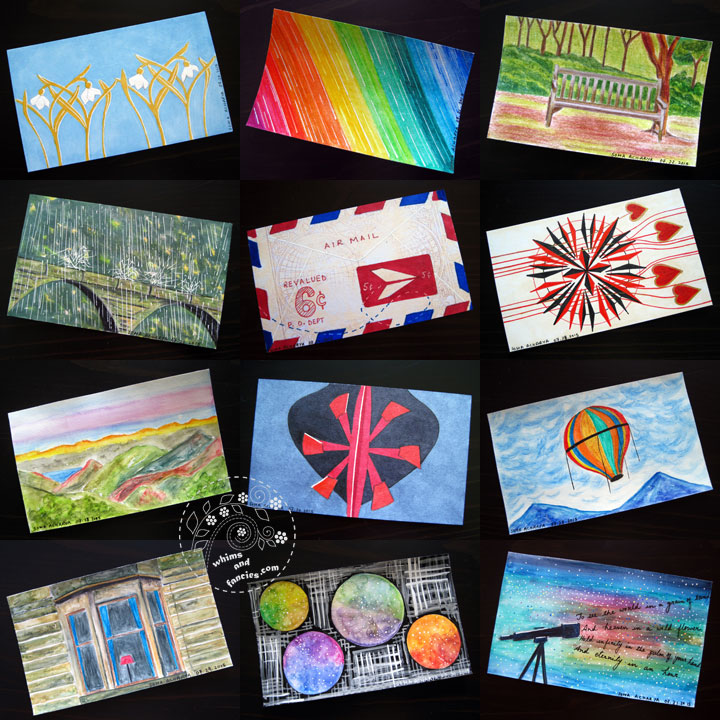
49. Snowdrop  50.  Star trails  51. Garden bench

52. Downpour  53. Mail  54. Affair of hearts

55. Western view of sunrise  56. Brunel’s SS Great Britain 57. Historic hot air balloon

58. Edinburgh flat  59. Explore other worlds  60. William Blake – Eternity in an hour


I hope you enjoyed them.  Many thanks to you for leaving encouraging comments, to Dixie from Arranged Words for inspiring me with her artwork to get back to painting, and to my husband for putting up with “I’ll be right there, just need to finish this one little bit” while he took care of a lot of things during those two months.

This year I am doing the daily photo project and sharing the photos on the monthly Wandering Camera linky party that I am also hosting here.


Camera And Photography Linky Party | Whims And Fancies


Wandering Camera


I suppose I like these immersing projects way too much!  Art is good for the soul, right?!

-Soma


Leave a comment


Enter your email to receive new inspirations, product reviews and pro-tips
icon
error: Content is protected !!